How I Self-Published a Children’s Book
A few years ago, I self-published my second children’s book, “Hina’s Busy Day”.
It took a few years and some savings to finance, but it was absolutely worth it. It checks off a line on my “bucket list”, instills me with pride, and fills my heart seeing children enjoy my work.

Book cover art (left) and final pages from the book itself (right).
Looking back, I can identify three phases to the overall process: preparation, creation, and production.
PREPARATION
The first steps were to brainstorm ideas, jot them down, and collect them.
Brainstorming was an active process. While observing everyday life, I kept an eye out for things I could incorporate into the book. For example, if I saw a bird, I wondered if it would fit as a character in the story.
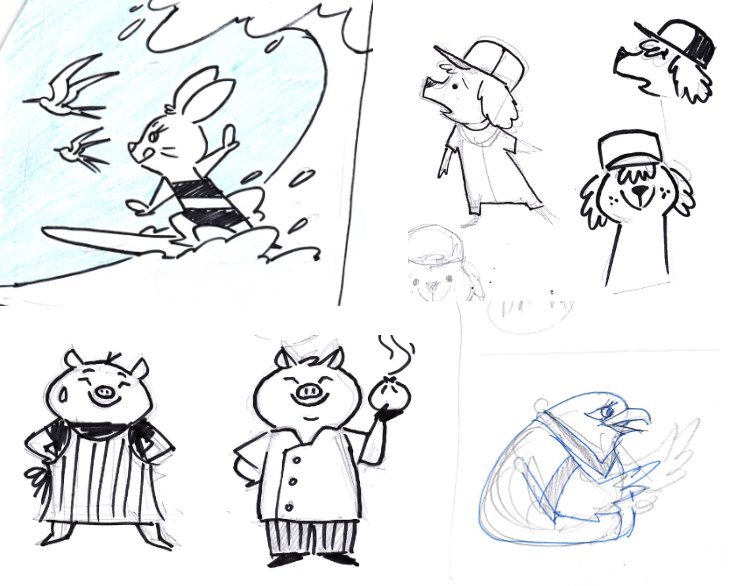
Some initial sketches for characters in “Hina’s Busy Day”.
Documenting and storing my ideas was critical to building the book. Having a catalog of ideas allowed me to mix and match them until a story came together. Also, some ideas and designs that seemed unusable earlier turned out useful later.
Most of the time spent during this phase was revising and developing ideas and designs. Even if I wasn’t completely happy with a character or idea, I just started with something. And as I progressed, I made changes and revisions.

A visual outline showing the different characters and objects used in the story.
I also needed to decide a book size and who would produce the book.
I went with Blurb’s 8” x 10” trade book format. I wanted a large format since this was a children’s book and would feature large, full page illustrations. Compared to Blurb’s photo books, trade books offer a better balance between cost and quality.
Blurb was one of the my expensive options, but they had excellent customer service, high book quality reviews, and allowed my book to be purchased online via their website.

Blurb’s Trade Book product offers a balance between cost and quality.
CREATION
With the dimensions of the book established, I was able to make a storyboard. The storyboard allowed me to see how the illustrations matched up to the text, how the layouts would be composed, where I could leave space for text, and how many illustrations would be needed.
Revisions and changes were still being made during this phase. But it was helpful to see the book starting to take shape.

VERY rough pages from “Hina’s Busy Day” storyboard. I’ve since learned to make my concepts sketches cleaner and clearer.
Using the storyboard as a guide, I created the illustrations using Affinity Designer (a cost-effective and capable alternative to Adobe Illustrator).
After the illustrations were done, I loaded them into BookWright (Blurb’s proprietary book creation app). In BookWright, I added the text.

Screenshot of Blurb’s bookmaking app, BookWright.
Choosing an appropriate typeface (or font) took some thought. There are a LOT of fonts out there so it took a little while to go through all of them.
Since my general style tends to be minimalist and my audience was children, I wanted something easy to read. So I decided on Avenir, a clean sans serif font.
For the title, I could afford to be a little playful, as long as it was still readable. So I purchased the Horseshoes typeface. Then, using Affinity Designer, manually manipulated each letter to create a pleasing title composition.

Partial typefaces (fonts) list in Affinity Photo.
PRODUCTION
When all the pages were completed, I created a PDF proof in BookWright. The proof allowed me to spot errors or see areas that needed creative changes.

Before ordering any books, I generated and carefully reviewed a PDF proof. It may also be helpful to have others take a look as well.
When the proof looked good, I uploaded the pages to Blurb via the BookWright app and ordered a few hard copies for final review.
Once I was satisfied with the physical hard copy, I put in a larger order so I had books to sell for in-person events and to give as gifts.
Still have questions? Feel free to comment below or contact me directly!

The book turned out great! If you’d like to purchase a copy, stop by my Etsy shop!